Like Bilbo at the end of the Hobbit… only with a laptop

Ten years ago I made the best spontaneous decision of my life, but let’s start at the end…

My wife and I and our two cats are moving back to Germany. No need to worry though, because I’ll continue to make video games with the talented and nice folks at Double Fine.

When I first moved to San Francisco in order to join LucasArts I thought I would only stay for a year or two before going back to Europe, but here I am many years later. In hindsight it’s no surprise though, because the Bay Area is an amazing place to work and live and the best part about moving to San Francisco is that I was able to meet amazing people and that I’m fortunate enough to call many of them my friends today.

Never would I have dreamed to work with Tim Schafer on a brand new adventure game or that I would be able to help to resurrect my favorite game of all time: Monkey Island. I’m certainly very grateful for these opportunities! Looking back at it now it’s hard to believe that none of this might have happened since I originally didn’t even plan to move abroad.

SF_and_GGB

While I was finishing my studies in Dresden (Germany) I started to look for jobs as a programmer in games or movies (e.g. visual effects). The job market at that time was very limited and it was tough finding a company that was willing to hire somebody straight out of school especially within Germany. I started expanding the search radius and eventually I found a small company in Scotland that offered me a position.

I made the spontaneous decision to give it a try, packed a bag (yep just one), booked a flight to Scotland and reserved a room in a hostel. I still remember sitting in the train to the airport thinking to myself “This is crazy! Why am I doing this? What if this doesn’t work out?” One of the most important lessons I learned since then is that it doesn’t really matter whether or not a plan works, since there is always a way forward. Being able to experience life somewhere outside of my comfort zone was definitely worth the risk and I wouldn’t want to miss a single second of it.

I didn’t end up staying in Scotland for too long though and after working in London for a while I decided to move to San Francisco by accepting a job offer at LucasArts where I joined a group called Team 3 (we didn’t work on Star Wars or Indiana Jones and hence we were the third team) to work on a really cool sci-fi game. Unfortunately management was very unstable at the time and our project was cancelled just months after I started to work at LucasArts.

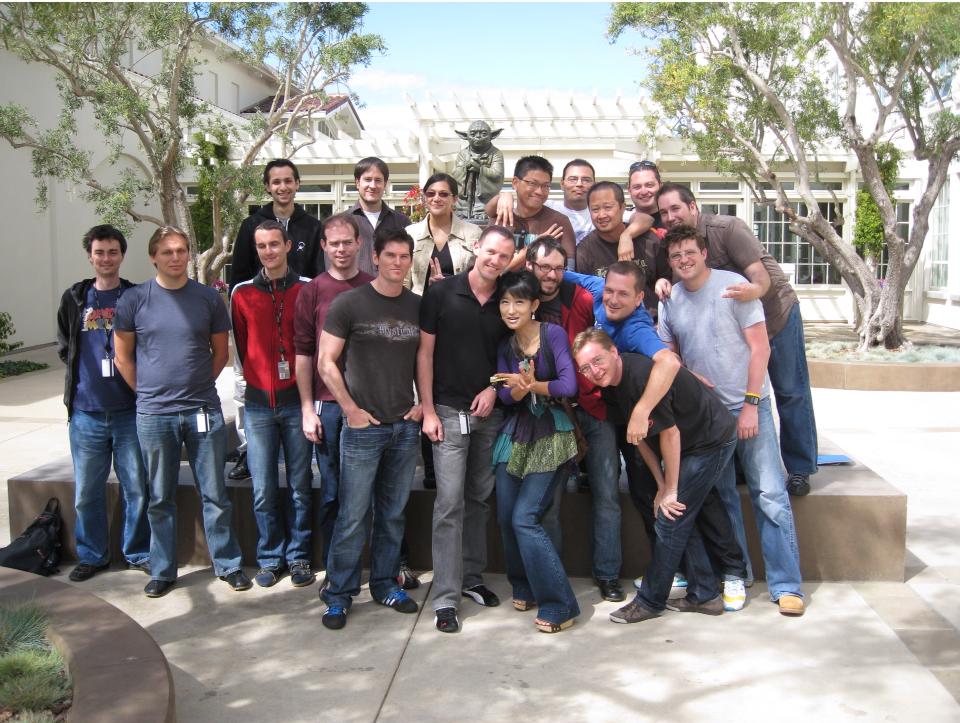
Team 3 at LucasArts - Bonus points if you can spot the programmers.

Team 3 at LucasArts – Bonus points if you can spot the programmers.

Our team (see photo above) decided to use this time of uncertainty in a productive way by digging through the archives. We found the source code and some assets for the classic point & click adventure game Monkey Island and started porting it to modern hardware; mostly because we had nothing better to do. I’m still super proud of what we achieved and I have to say it was fantastic to be able to work on the favorite game of my childhood.

The reoccurring layoffs at LucasArts became very exhausting after a while and I realized that it was time to move on. A friend of mine who worked at Double Fine invited me to check out the studio and I immediately fell in love with the creativity and the general vibe in the office and so I came back for an interview. The rest is history…

Double_Fine_2014

My time at Double Fine was wonderful. I mean just look at that awesome bunch! Everyone is incredibly talented, creative and passionate about what they do and I’m very proud of all the games I was able to contribute to. Now that Broken Age is done though it’s time for me to go home and while I’m sad that I won’t be in the office anymore I’m happy that I’ll be able to continue to work with these amazing people in the future.

Coming back to Germany after being away for a decade will be strange for me and I think I’ll probably feel like a foreigner for a while, but I’m definitely looking forward to be closer to my family and friends who I haven’t seen that much in the last couple of years.

In a way I feel like Bilbo Baggins returning to the Shire at the end of the Hobbit… only with a laptop and the internet… Alright maybe this analogy doesn’t work all that well, but I’m excited about the future nonetheless. Let’s make some awesome games you guys!

Design and implementation of a domain-specific language

Over the last couple months I spent parts of my (limited) spare time to learn more about compiler design and implementation. Converting a high-level program into executable code for a specific target (virtual) machine is a challenging and in my opinion very fascinating problem.  I knew from the beginning that writing a complete compiler for a general-purpose programming language like C++ or C# would be interesting but ultimately too much work for a hobby project. Instead I decided to implement a (small) domain-specific language for 2D cutscenes. I’ve always been a big fan of SCUMM the scripting engine for Maniac Mansion, Monkey Island and the other LucasArts adventure games, so I wanted to work on something similar.

CDSL_WritingACompiler

My goal for this project was to design a (very) simple language that can be used to create 2D actors (e.g. robots) which can be animated and moved around the scene. I also wanted to make it possible to show text for descriptions and actor conversations.

One of the revolutionary features of SCUMM was cooperative multi-threading, which made it possible to implement the behavior of different actors as a list of sequential commands or in other words each actor could execute its logic on a separate fiber. I really like this feature since it not only supports but emphasizes clean localized code and my goal was therefore to add support for co-routines to my cutscene language.

The script for a cutscene should be compiled into a (compact) byte-code representation which is then executed by a virtual machine (VM). It was important to me to use a (formal) grammar to define the language, so that it’s easy to verify whether or not a given script is valid.

Another goal was to make sure the compiler is very stable. It should be impossible to crash the compiler even when random data is entered. In fact I wanted to make sure that the compiler produces at least semi-helpful error messages if the script isn’t valid. Rather than “unable to compile script” the compiler should report something along the lines of “Syntax error: mismatched input ‘;’ expecting Digit (line 2 column 13)”.

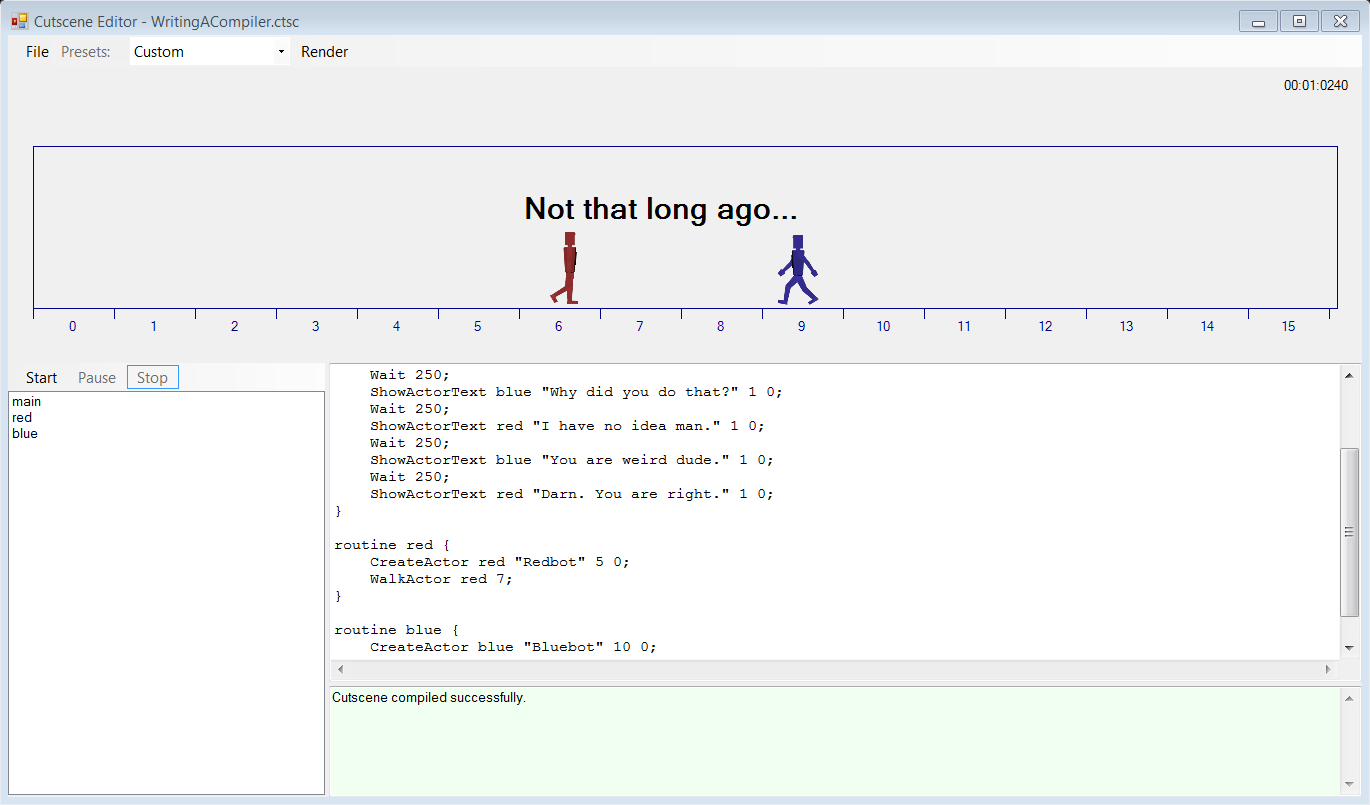
I had a lot of fun working on this project and the following screenshot shows the current state of the “Cutscene Editor”. I achieved all of the goals mentioned above and I was even able to add a couple of extra features:

  • Interactive editor provides instant feedback when writing cutscene scripts
  • Disassembler converts a ‘executable’ into a cutscene script
  • Cutscenes can be saved as an animated GIF
  • Actor definitions (e.g. animation lists) are also defined by a (formal) grammar
Cutscene Editor - Click to zoom.

Cutscene Editor – Click to zoom.

I want to emphasize the fact that the goal of this project was NOT to create a full 2D scripting system that can be used for a real world project. There are a lot of missing features like variables, functions or math expressions. These concepts aren’t necessarily hard to implement, but I wanted to keep the scope of the compiler small so that A) the code is easy to read and understand and B) so I can actually finish this project.

You can download the “Cutscene Editor” here and try it out yourself. It was implemented using C#, so you’ll need Mono on a non-Window operating system to run it. I also decided to release the source-code for this project under the MIT license, so please feel free to modify or extend it at your heart’s content.

Write a grammar not a parser

The main job of a compiler is to convert a program written in human-friendly text form into a compact representation that can be executed efficiently by the target machine. In other words the compiler has to analyze the input code and identify all the statements (lexing, parsing) that should be executed and then convert them into an efficient sequence of commands (compiling) before generating an executable (linking).

My cutscene language is very simple which means that (lexing and) parsing a cutscene script is the most complicated step. Writing a parser isn’t difficult, but implementing a stable and efficient parser certainly is. To make things worse it’s also not the most interesting task and I would even go as far as to call it tedious work. Rather than writing lots of string splitting and searching code I decided to define my cutscene language using a grammar. Obviously I’d still need a parser in order to convert a cutscene script into byte-code though…

Thankfully this problem was easily solved by using a parser generator called ANTLR, which my good friend David Swift mentioned to me. ANTLR is a free meta-parser or in other words it parses a grammar in order to generate a parser for the given grammar. Even though it is implemented in Java it can produce parsers in various languages such as C#, Python and obviously Java. Since I wanted to use C# for this project anyway ANTLR turned out to be the perfect fit.

Defining my cutscene language using ANTLRs grammar was straight forward. You can see the full language specification below. This might look intimidating at first, especially if you aren’t used to working with grammars, but it’s actually pretty simple. The highlighted area contains the ‘important bits’ as it defines all the keyword for the language.

Cutscene grammar - Click to zoom.

Cutscene grammar – Click to zoom.

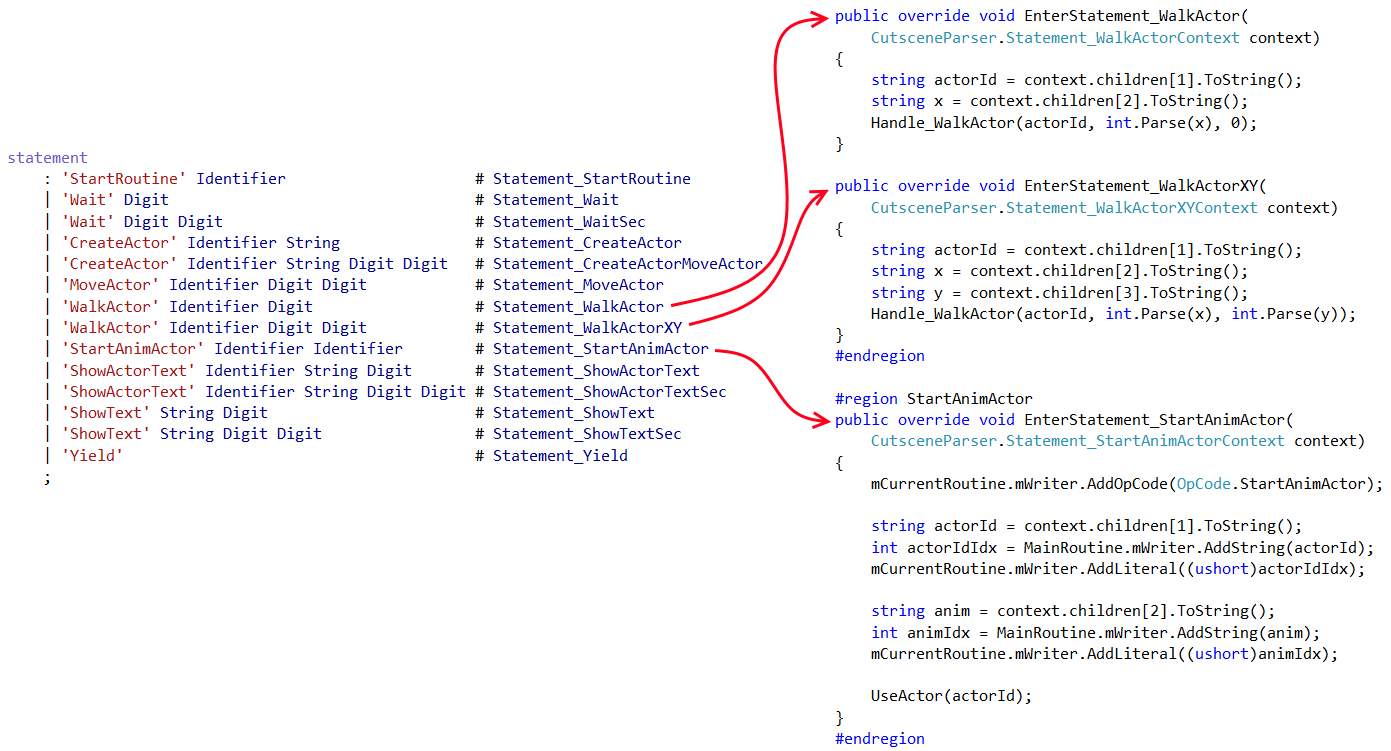
I then used ANTLR to generate a C#-based parser for my cutscene language. ANTLR will automatically create an interface with handler methods for the keywords (and the rest of the grammar), so implementing a parser was as simple as implementing the interface. The following image shows the mapping between the grammar and (some of) the generated parser callback methods.

Grammar mapping - Click to zoom.

Grammar mapping – Click to zoom.

In addition to making it very convenient to parse cutscene scripts ANTLR also produces very helpful (syntax) errors if it provided cutsene isn’t valid. For example if a user forgets a semicolon ANTLR will generate a message describing the problem (missing ‘;’) and its location (line, column).

Generating the byte-code

The byte-code generation (aka the compilation step) is easily implemented by extracting the arguments for the keywords from the context that is passed into the ANTLR-generated handler methods. For example the ‘WalkActor’ statement is compiled by extracting the name and the target location of the actor from the parsing-context before encoding this information in the byte-code of the current co-routine. The code below shows an example.

CDSL_WalkActorHandler

Once the byte-code for all co-routines is created the final executable is produced by combining the byte-code of all used co-routines into an executable. This so called linking step is very complicated for a general-purpose language like C++, but thankfully that isn’t the case for my simple cutscene language. In fact the most complicated aspect of the linking step is to compute the correct start address for ‘StartRoutine’ calls.

At this stage the compiler also makes sure that the script only uses actors that are created and a error will be printed if that isn’t the case. The linker doesn’t currently reason about the order of execution, so it is still possible to cause a run-time error by using an actor before it is created.

Executing the byte-code

Obviously the main goal of designing a domain-specific language and writing a compiler for it is to execute the generated byte-code. In the context of my simple cutscene language this is actually pretty easy to do. The interpreter (aka virtual machine) simply iterates over all active co-routines and executes its commands until either a yield, return or blocking operation is encountered.

Blocking operations won’t move the program counter (PC) until the command is completed. Most of these operations use local (per co-routine) registers to store the state of the command. For example the ‘Wait’ operation stores the elapsed time (in milliseconds) in register A. Once the value in the register is equal or larger to the specified wait duration the command is marked as completed and the PC is moved to the next operation.

As long as there is at least one co-routine that is still active the ‘renderer’ iterates of the current actors and draws their currently active animation frame along with all visible text instances. Once all co-routines encounter a return operation the cutscene has ended.

Conclusion

My takeaway from this project is that designing and implementing a simple domain-specific language is actually not that hard and certainly a lot of fun. Using ANTLR to generate the parser for the language has convinced me of the benefits of defining data formally using a grammar (or schema). I don’t even want to know how much time I spent writing parsers during my career.

I’ll probably never design and implement a programming language in my professional life (and I think that’s for the best), but I’ll certainly experiment with the idea of using a grammar to define asset files in the future. Hopefully I’ll never have to write another parser again!

Downloads

Executable

Code

So they made you a lead; now what?

What to do after you get promoted into a leadership position should be a trivial question to answer, but in my experience the opposite is true. In fact sometimes it seems to me that leadership is some kind of taboo topic in the games industry. Making games is supposed to be creative and fun and people would rather not talk about a ‘boring’ topic like leadership, but everyone who has had a bad supervisor at some point will agree that lack of leadership skills can be incredibly harmful to team morale and therefore to the game development process. That’s why, when I was first promoted into a leadership position, I set myself the goal to be just like the awesome supervisors I had in the past. But what made these people a great boss? I had no idea, but I assumed I would figure it out myself along the way. Looking back at it now I have to admit I was quite naïve.

After learning more about the theory and practice of leadership I realized that I was unprepared for this role and I’m not the only one with this experience. Before I started writing this article I talked to several leads (or ex-leads) and none of them had ever received any kind of leadership training. Some people were lucky enough to have a mentor, but even that doesn’t seem to be the standard. To me the most troubling fact is that none of the leads were ever told what was expected of them in their new role.

Given how important this role is you would think that game studios would invest some time and money to train their leads, but that doesn’t seem to be the case. The optimistic interpretation is that the companies trust their employees enough to quickly pick up the required skills themselves. The pessimistic interpretation on the other hand is that management simply doesn’t care or know any better. The real reason is probably located somewhere in between these extremes, but it doesn’t change the fact that most new leaders are simply thrown in at the deep end.

When I was first promoted into a leadership role I really had no clue what I was doing or what I was supposed to do. I was a good programmer and a responsible team player (which is why I was promoted I guess) and I figured I should simply continue coding until some kind of big revelation would turn me into an awesome team lead. Obviously I never had this magical epiphany and after a while I realized I should probably start investigating leadership in a more methodical way.

My goal for this article is to share some of the lessons I learned myself while adjusting to my role as a lead programmer. If you were recently promoted into a leadership position hopefully you’ll find some of the content in this post helpful. If you had different experiences or have additional advice you’d like to share, then please leave a comment or contact me directly.

I want to emphasize the fact that leadership isn’t magic nor do you have to be born for it. Leadership is simply a set of skills that can be learned and in my experience it’s worth the time investment!

What is leadership anyway?

At the heart of a leadership position are people skills which make this role different from a regular production job. Being a great programmer, designer or artist doesn’t necessarily mean you are also an awesome team lead. In fact your production skills are merely the foundation on which you’ll have to build your leadership role.

But what exactly are these necessary people skills and what makes an effective team lead? Depending on who you talk to you’ll get different answers, but I think that the core values of leadership are about developing trust, setting directions and supporting the team in order to make the best possible product (e.g. game, tool, engine) with the given resources and constraints.

In order to be an effective lead you’ll first have to earn your colleagues trust. If your team feels like they can’t come to you with questions, problems or suggestions, then you (and the company) have a big problem. Gaining the trust of your team doesn’t happen automatically and requires a lot of effort. You can find some practical advice how to work on this in the ‘leadership starter kit’ below.

Similarly if your supervisor (e.g. project lead) doesn’t trust you, then he or she will probably manage around you which is a bad situation for everyone involved. In my experience transparency is crucial when managing up especially when things don’t go as planned. Let your supervisor know if there is a problem and take responsibility by working on a solution.

Making games is complicated and it would be unrealistic to assume that there won’t be problems along the way. Dealing with difficult situations is much easier if everyone on your team is on the same page about what has to get done. Setting a clear direction for your team is therefore a crucial part of your role.

A great mission statement is concise so that it’s easy to remember and explain. For an environment art team this could be “We want to create a photorealistic setting for our game” whereas a tools lead might come up with “Every change to the level should be visible right away”. Of course it is important that your team’s direction is aligned with the vision of the project, because creating a photorealistic environment for a game with a painterly art style doesn’t make sense.

In addition to defining a clear direction for your team one of your main responsibilities as a lead is to provide support for your team, so that they can be successful. This might seem very obvious, but the shift from being accountable only for your own work to being responsible for the success of a group of people can be a hard lesson to learn in the beginning.

Almost all leads I talked to mentioned that they were surprised by how little time they had for their ‘actual job’ after being promoted. It is important to realize that the support of your team is your actual job now, which means that you’ll have to balance your workload differently. Some practical advice for this specific issue can be found below in the ‘leadership starter kit’.

Support can be provided in many different ways: Discussing the advantages and disadvantages of a proposed solution to a problem is one example. Being a mentor and helping the individual team members with their career progression is another form of support. A third example is to make sure that the team has everything it needs (e.g. dev-kits, access to documentation, tools …) to achieve the goals.

As a lead you might also have to support your team by letting someone know that his or her work doesn’t meet your expectations. A conversation like this isn’t easy, but it is important to let the person know that there is a problem and to offer advice and assistance to resolve the situation.

What leadership isn’t

In order to avoid misconceptions and common mistakes it can be quite useful to define what leadership (in the games industry) is not. This topic is somewhat shrouded in mystery and there are many incorrect or outdated assumptions.

For example I thought for the longest time that leadership and management are the same thing. This is not the case though and when I talked to other leads about what they dislike about their role I found that most aspects mentioned were in fact related to management rather than to leadership. Of course it would be unrealistic to assume that you will be able to avoid management tasks altogether, but getting help from a producer can reduce the amount of administrative work significantly.

Another misconception that is often popularized by movies is that you have to demonstrate your power as a leader by barking out orders all day. This might work well in the army, but making video games requires collaboration and creativity and an authoritative leadership has no place in this environment. An inspired team is a productive team and autonomy is crucial for high morale.

Equally as bad is to ignore the team by using a hands-off leadership approach. This mistake is quite common since most team leads started their career with a production job. It can be tough for a new lead to accept the changed responsibilities, but in my opinion this is one of the most important lessons to learn. Rather than contributing to the production directly your primary responsibility as a lead is to support your team. Having time for design, art or programming in addition to that is great, but the team should always come first.

As a lead you are responsible for your team, which means that you’ll also have to deal with complications and it’s inevitable that things will go wrong during the production of a game. Your team might introduce a new crash bug or maybe you run into an unexpected problem that causes the milestone to slip. Whatever the issue may be as a lead you are responsible for what your team does and playing the blame game is the worst thing you can do, because it’ll ruin trust and team morale. Instead of shifting your responsibility to a team member you should concentrate on figuring out how to solve the problem.

Learning leadership skills

Now that we have a better understanding of what leadership is (and isn’t) it’s time to look at different ways of developing leadership skills. Despite the claims of some books or websites there is no easy 5-step program that will make you the best team lead in 30 days. As with most soft skills it is important to identify what works for you and then to improve your strategies over time. Thankfully there are different ways to find your (unique) leadership style.

The best way to develop your skills is by learning them directly from a mentor that you respect for his or her leadership abilities. This person doesn’t necessarily have to be your supervisor, but ideally it should be someone in the studio where you work. Leadership depends on the organizational structure of a company and it is therefore much harder for someone from the outside to offer practical advice.

Make sure to meet on a regularly basis (at least once a month) in order to discuss your progress. A great mentor will be able to suggest different strategies to experiment with and can help you figure out what does and doesn’t work. These meetings also give you the opportunity to learn from his or her career by asking questions like this:

  • How would you approach this situation?
  • What is leadership?
  • Which leader do you look up to and why?
  • How did you learn your leadership skills?
  • What challenges did you face and how did you overcome them?

But even if you aren’t fortunate enough to have access to a mentor you can (and should) still learn from other game developers by observing how they interact with people and how they approach and overcome challenges. The trick is to identify and assimilate effective leadership strategies from colleagues in your company or from developers in other studios.

While mentoring is certainly the most effective way to develop your leadership skills you can also learn a lot by reading books, articles and blog posts about the topic. It’s difficult to find good material that is tailored to the games industry, but thankfully most of the general advice also applies in the context of games. The following two books helped me to learn more about leadership:

  • Team Leadership in the Games Industry” by Seth Spaulding takes a closer looks at the typical responsibilities of a team lead. The book also covers topics like the different organizational structure of games studios and how to deal with difficult situations.
  • How to Lead” by Jo Owen explores what leadership is and why it’s hard to come up with a simple definition. Even though the book is aimed at leads in the business world it contains a lot of practical tips that apply to the games industry as well.

Talks and round-table discussions are another great way to learn from experienced leaders. If you are fortunate enough to visit GDC (or other conferences) keep your eyes open for sessions about leadership. It’s a great way to connect with fellow game developers and has the advantage that you can get advice on how to overcome some of the challenges you might be facing at the moment.

But even if you can’t make it to conferences there are quite a few recorded presentations available online. I highly recommend the following two talks:

  • Concrete Practices to be a Better Leader” by Brian Sharp is a fantastic presentation about various ways to improve your leadership skills. This talk is very inspirational and contains lots of helpful techniques that can be used right away.
  • You’re Responsible” by Mike Acton is essentially a gigantic round-table discussion about the responsibilities of a team lead. As usual Mike does a great job offering practical advice along the way.

Lastly there are a lot of talks about leadership outside of the games industry available on the internet (just search for ‘leadership’ on YouTube). Personally I find some of these presentations quite interesting since they help me to develop a broader understanding of leadership by offering different ways to look at the role. For example the TED playlist “How leaders inspire“ discusses leadership styles in the context of the business world, military, college sports and even symphonic orchestras. In typical TED fashion the talks don’t contain a lot of practical advice, but they are interesting nonetheless.

Leadership starter kit

So you’ve just been promoted (or hired) and the title of your new role now contains the word ‘lead’. First of all, congratulations and well done! This is an exciting step in your career, but it’s important to realize that your day to day job will be quite different from what it used to be and that you’ll have to learn a lot of new skills.

I would like to help you getting started in your new role by offering some specific and practical advice that I found useful during this transitional period. My hope is that this ‘starter kit’ will get you going while you investigate additional ways to develop your leadership skills (see section above). The remainder of the section will therefore cover the following topics:

  • One-on-one meetings
  • Delegation
  • Responsibility
  • Mike Acton’s quick start guide

As a lead your main responsibility is to support your team, so that they can achieve the current set of goals. For that it’s crucial that you get to know the members of your team quite well, which means you should have answers to questions like these:

  • What is she good at?
  • What is he struggling with?
  • Where does she want to be in a year?
  • Is he invested in the project or would he prefer to work on something else?
  • Are there people in the company she doesn’t want to work with?
  • Does he feel properly informed about what is going on with the project / company?

You might not get sincere replies to these questions unless people are comfortable enough with you to trust you with honest answers. Sincere feedback is absolutely critical for the success of your team though which is especially true in difficult times and therefore I would argue that developing mutual trust between you and your team should be your main priority.

Building trust takes a lot of time and effort and an essential part of this process is to have a private chat with each member of your team on a regular basis (at least once a month). These one-on-one meetings can take place in a meeting room or even a nearby coffee shop. The important thing is that both of you feel comfortable having an open and honest conversation, so make sure to pick the location accordingly.

These meetings don’t necessarily have to be long. If there is nothing to talk about then you might be done after 10 minutes. At other times it may take an hour (or more) to discuss a difficult situation. Make sure to avoid possible distractions (e.g. mobile phone) during these meetings, so you can give the other person your full attention.

One-on-one meetings raise the morale because the team will realize that they can rely on you to keep them in the loop and to represent their concerns and interests. Personally I find that these conversations help me to do my job better since it’s much more likely to hear about a (potential) problem when the team feels comfortable telling me about it.

At this point you might be concerned that these meetings take time away from your ‘actual job’, but that’s not true because they are your job now. Whether you like it or not you’ll probably spend more time in meetings and less time contributing directly to the current project. Depending on the size of your company it’s safe to assume that leadership and management will take up between 20% and 50% of your time. This means that you won’t be able to take on the same amount of production tasks as before and you’ll therefore have to learn how to delegate work. I know from personal experience that this can be a tough lesson to learn in the beginning.

In addition to balancing your own workload delegation is also about helping your team to develop new skills and to improve existing ones. Just because you can complete a task more efficiently than any other person on your team doesn’t necessarily mean that you are the best choice for this particular task. Try to take the professional interest of the individual members of your team into account as much as possible when assigning tasks, because people will be more motivated to work on something they are passionate about.

Beyond these practical considerations it is important to note that delegation also has an impact on the mutual trust between you and your team. By routinely taking on ‘tough’ tasks yourself you indicate that you don’t trust your teammates to do a good job, which will ruin morale very quickly. Keep in mind that your colleagues are trained professionals just like yourself, so treat them that way!

Experiencing your entire team working together and producing great results is very empowering and it is your job to make it happen even if nobody tells you this explicitly. In an ideal world it would be obvious what your company expects from you, but in reality that will probably not be the case. It is important to understand that while you have more influence over the direction of the project, your team and even the company you also have more responsibilities now.

First and foremost you are responsible for the success (or failure) of your team and any problem preventing success should be fixed right away. This could be as simple as making sure that your team has the necessary hardware and software, but it could also involve negotiations with another department in order to resolve a conflict of interest.

One responsibility that is often overlooked by new leads is the professional development of the team. It is your job to make sure that the people on your team get the opportunities to improve their skillset. In order to do that you’ll first have to identify the short- and long-term career goals of each team member. In addition to delegating work with the right amount of challenge (as described above) it is also important to provide general career mentorship.

A video game is a complicated piece of software and making one isn’t easy. Mistakes happen and your team might cause a problem that affects another department or even the production schedule. This can be a difficult situation especially when other people are upset and emotions run high. I know it’s easier said than done, but don’t let the stress get the best of you. Rather than identifying and blaming a team member for the mistake you should accept the responsibility and figure out a way to fix the problem. You can still analyze what happened after the dust has settled, so that this issue can be prevented in the future.

It is very unfortunate that a lot of newly minted team leads have to identify additional responsibilities themselves. Thankfully some companies are the exception to the rule. At Insomniac Games, for example, new leads have access to a ‘quick start guide’ that helps them to get adjusted to their new role. This helpful document is publicly available and was written by Mike Acton who has been doing an exceptional job educating the games industry about leadership. I highly recommend that you read the guide: https://web.archive.org/web/20140701034212/http://www.altdev.co/2013/11/05/gamedev-lead-quick-start-guide/ (Original post: http://www.altdev.co/2013/11/05/gamedev-lead-quick-start-guide/)

Leadership is hard (but not impossible)

Truth be told becoming a great team lead isn’t easy. In fact it might be one of the toughest challenges you’ll have to face in your career. The good news is that you are obviously interested in leadership (why else would you have read all this stuff) and want to learn more about how to become a good lead. In other words you are doing great so far!

I hope you found this article helpful and that it’ll make your transition into your new role a bit easier.

Good luck and thank you for reading!

PS.: Whether you just got promoted or have been leading a team for a long time I would love to hear from you, so please feel free to leave a comment.

PPS: I would like to thank everybody who helped me with this article. You guys rock!

Memories of Virtuality: Adding VR support to Mnemonic

Now that we wrapped up this year’s Amnesia Fortnight (which is the name of Double Fine’s public game jam) and released the prototypes I wanted to share my thoughts on adding Oculus Rift support to ‘Mnemonic’. Some of you might know that I’m personally very excited about the current developments in VR which is why I pitched a sci-fi exploration game called ‘Derelict’ that would have been developed for the Oculus Rift from day one.

Even though it didn’t get picked in the end I was still lucky enough to work on VR for Derek Brand’s film noir inspired exploration / adventure game ‘Mnemonic’ and I think it turned out great! In this blog posts I will shed some light on some of the technical and non-technical aspects of adding support for the Oculus Rift to the prototype.

Obviously I didn’t do all the work myself and the VR version of ‘Mnemonic’ would not have been possible without major contributions from Brandon Dillon (@Noughtceratops) and Matt Enright (@ColdEquation)!

The following quick presentation introduces the topic in five short minutes:

Game design

In ‘Mnemonic’ you have to discover your past by entering the surreal world of your memories. As you explore different events you can restore more memories by solving adventure-game style puzzles which will eventually lead you to a dark secret. I think the team definitely nailed Derek’s vision of a film noir art style. The game is rendered (almost) entirely in black and white and looks stunning and that the prototype was created in only 2 weeks still blows my mind.

The design of ‘Mnemonic’ is a great fit for the Oculus Rift since the game is slow paced and doesn’t require fast or unnatural player movement (e.g. strafing, jumps). The core mechanic is to look at and interact with interesting things, which works very well even with current generation of VR headsets. The fact that you are exploring memories also helps the VR experience, because the brain does not expect 100% realistic behavior from the game world (e.g. ‘why can’t I push that barrel’).

One thing I wish we could have done is to give the main character a (virtual) body since it would have helped to increase the feeling of immersion by creating a stronger connection between the player and the virtual alter ego. In one of the memories you are sitting in a car and it really feels weird to see the seat instead of a body when looking down.

I think the finished result proves the point that you have think about VR from the beginning in order to create a great experience. Porting the design of a game to VR after it is done will never be as successful as incorporating it from the start.

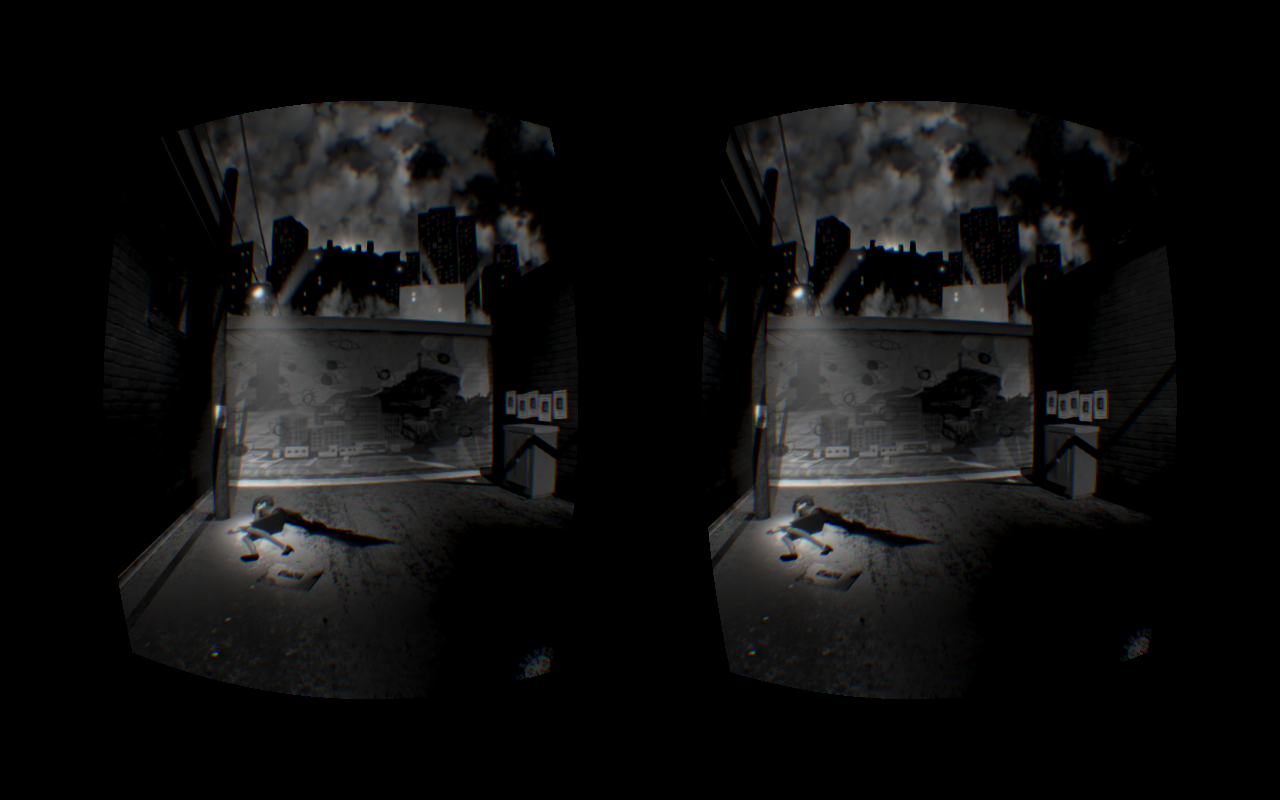
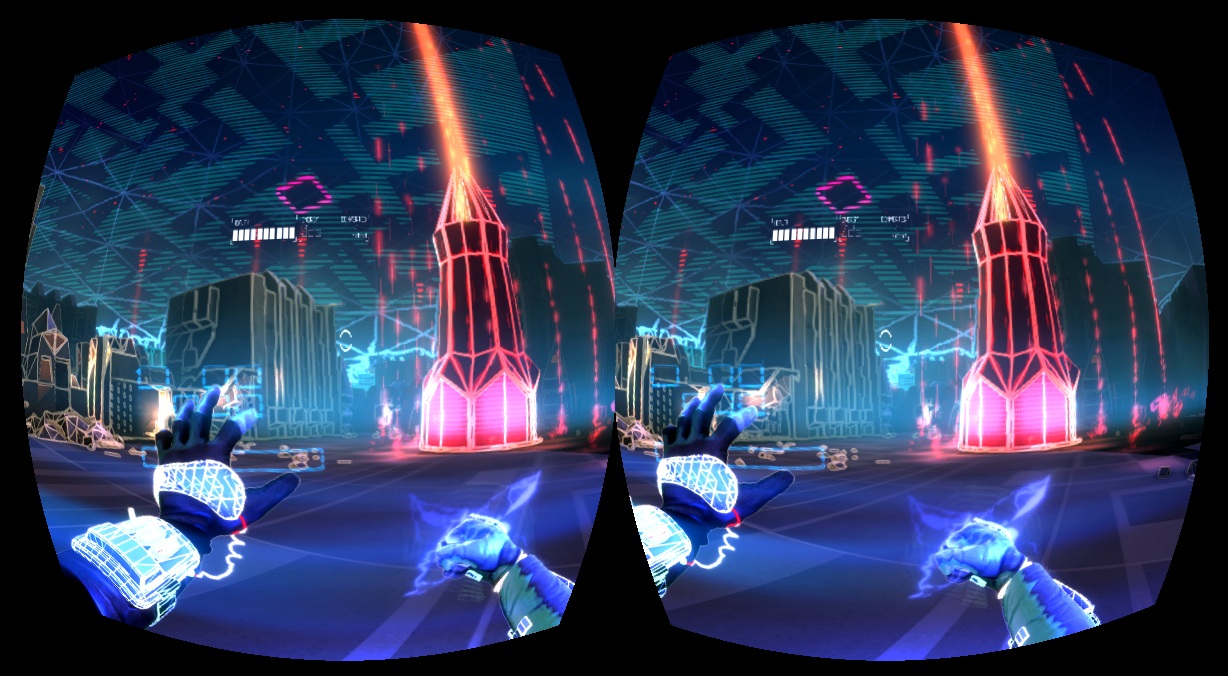
Mnemonic in VR mode

Mnemonic in VR mode

Adding VR support to our game engine

I originally integrated Oculus Rift support to ‘Autonomous’ a while ago in my spare time, because I wanted to know how complicated it would be to add such a feature to a preexisting and relatively complicated code base.

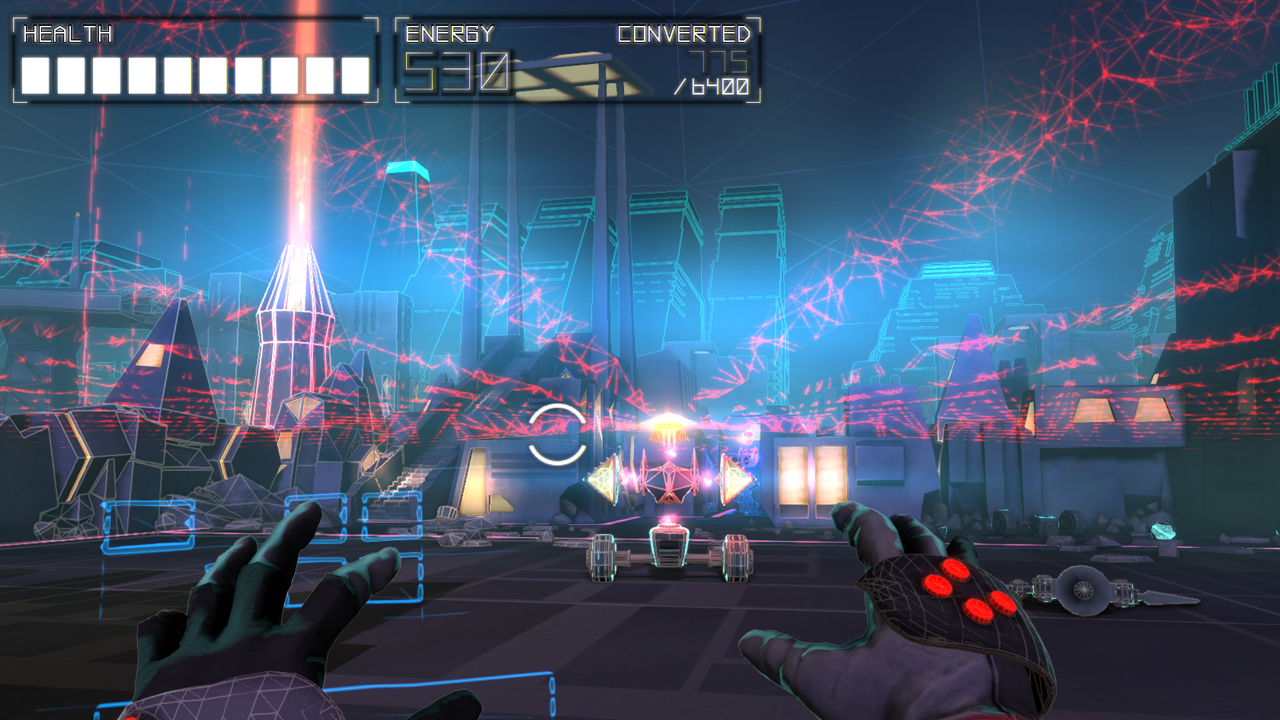
‘Autonomous’ is a first-person game that lets you build and program autonomous robots in a cool 80s inspired sci-fi world. The game was Lee Petty’s pitch for Amnesia Fortnight in 2012 and I contributed to the prototype as a graphics programmer. If you have a Leap controller you can check out the game here: http://autonomousgame.com/

Autonomous

Autonomous

In order to add Oculus Rift support to our proprietary ‘Buddha’ game engine I had to first solve the problem of rendering the current scene for each eye. Since ‘Buddha’ uses immediate mode rendering I was able to draw the scene twice by simply duplicating the frame data and offsetting the camera for each eye.

I ran into an interesting problem with our implementation of directional sun-light shadows though. Since ‘Buddha’ was originally developed for ‘Brutal Legend’ it uses cascaded shadow maps in order to provide high quality shadows at varying distances. The cascades are computed by splitting the view frustum into multiple slices, but since the frustum for each eye were slightly different the resulting shadow maps caused disparity between the left and right eye.

This may seem like a minor problem, but the differences were big enough to create discomfort when playing the game. It took me a while to figure out what was going on, but in the end I was able to identify the discrepancy by performing the ‘left-eye-right-eye-test’: Close the right eye and look at the scene, then open the right eye and close the left eye and compare the rendered results. Any visual difference that is not directly connected to the camera offset is a VR bug!

My solution for this problem was to perform all shadow calculations in the space centered between both eyes. Due to complications, which are beyond the scope of this blog post, it wasn’t possible to cache the shadow maps for the second frame, so there is definitely some room for future improvements.

The rest of the integration was relatively straight forward and in the end ‘Autonomous’ looked like this in VR mode:

Autonomous in VR mode

Autonomous in VR mode

Integrating VR into Mnemonic

Adding to support for the Oculus Rift to ‘Mnemonic’ was straight forward using the VR integration mentioned above (especially after Brandon cleaned up my experimental code). We simply retrieve the orientation from the HMD and apply it to the FPS camera. The user is also able to rotate the camera left and right with the mouse (or game-pad), in order to make it possible to reorient the main character.

Initially there were plans to add cutscenes to the prototype that would take away camera control from the player, but we managed to convince the team that this would make people feel sick and therefore break the VR experience. In the final prototype the player has full control over the orientation of the camera at all times and I think it definitely helps to prevent nauseousness (aka VR sickness).

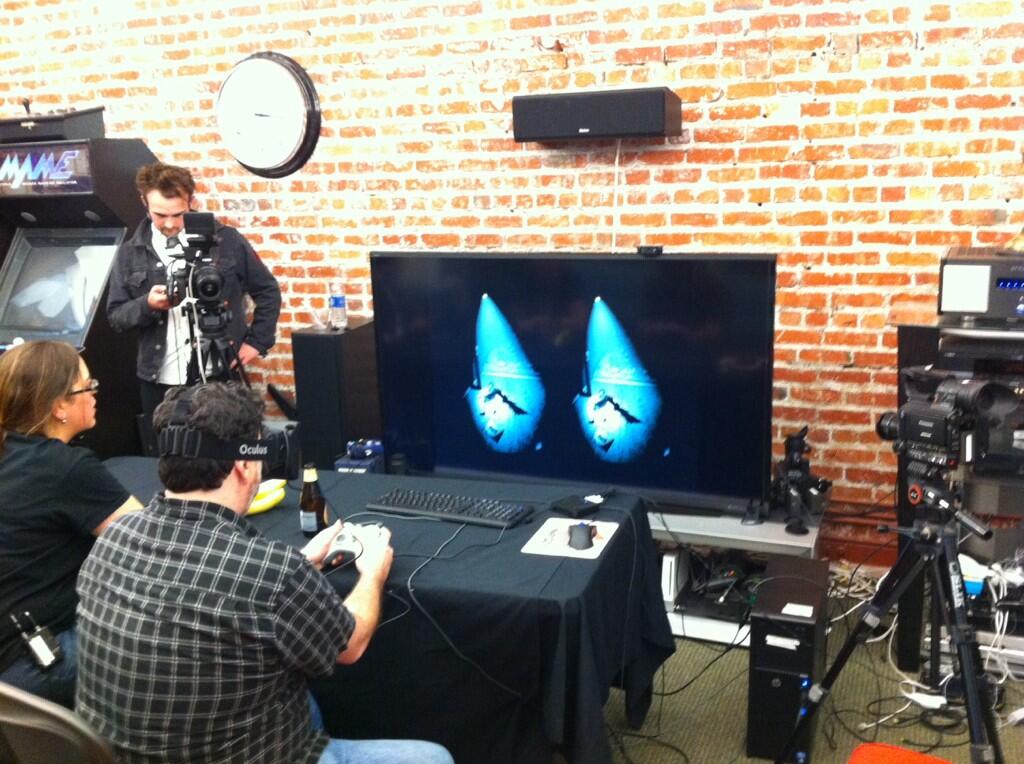
Here is a picture of Tim playing the ‘Mnemonic’ prototype in VR mode using the Oculus Rift:

Mnemonic_VR_Tim

User interface design

Traditional 2D UI doesn’t work well in VR, which is a lesson I had previously learned when adding Oculus Rift support to ‘Autonomous’. The main problem is that you can’t simply blit the UI on top of the scene. Drawing a 2D element at the same screen-space location for both eyes essentially means that the UI is infinitely far away. However since it is supposed to be on top of everything else the brain can’t really make sense of what it sees.

For ‘Autonomous’ I used the solution described in Joe Ludwig’s excellent paper about adding VR support to ‘Team Fortress 2’. The idea is to draw the UI as a camera-attached plane which ‘floats’ in front of the camera. Since the plane has a real distance to the camera each eye will see it at a slightly different screen-space location and the brain will therefore interpret it correctly. Readability of the UI is still problem, but that is a story for another day…

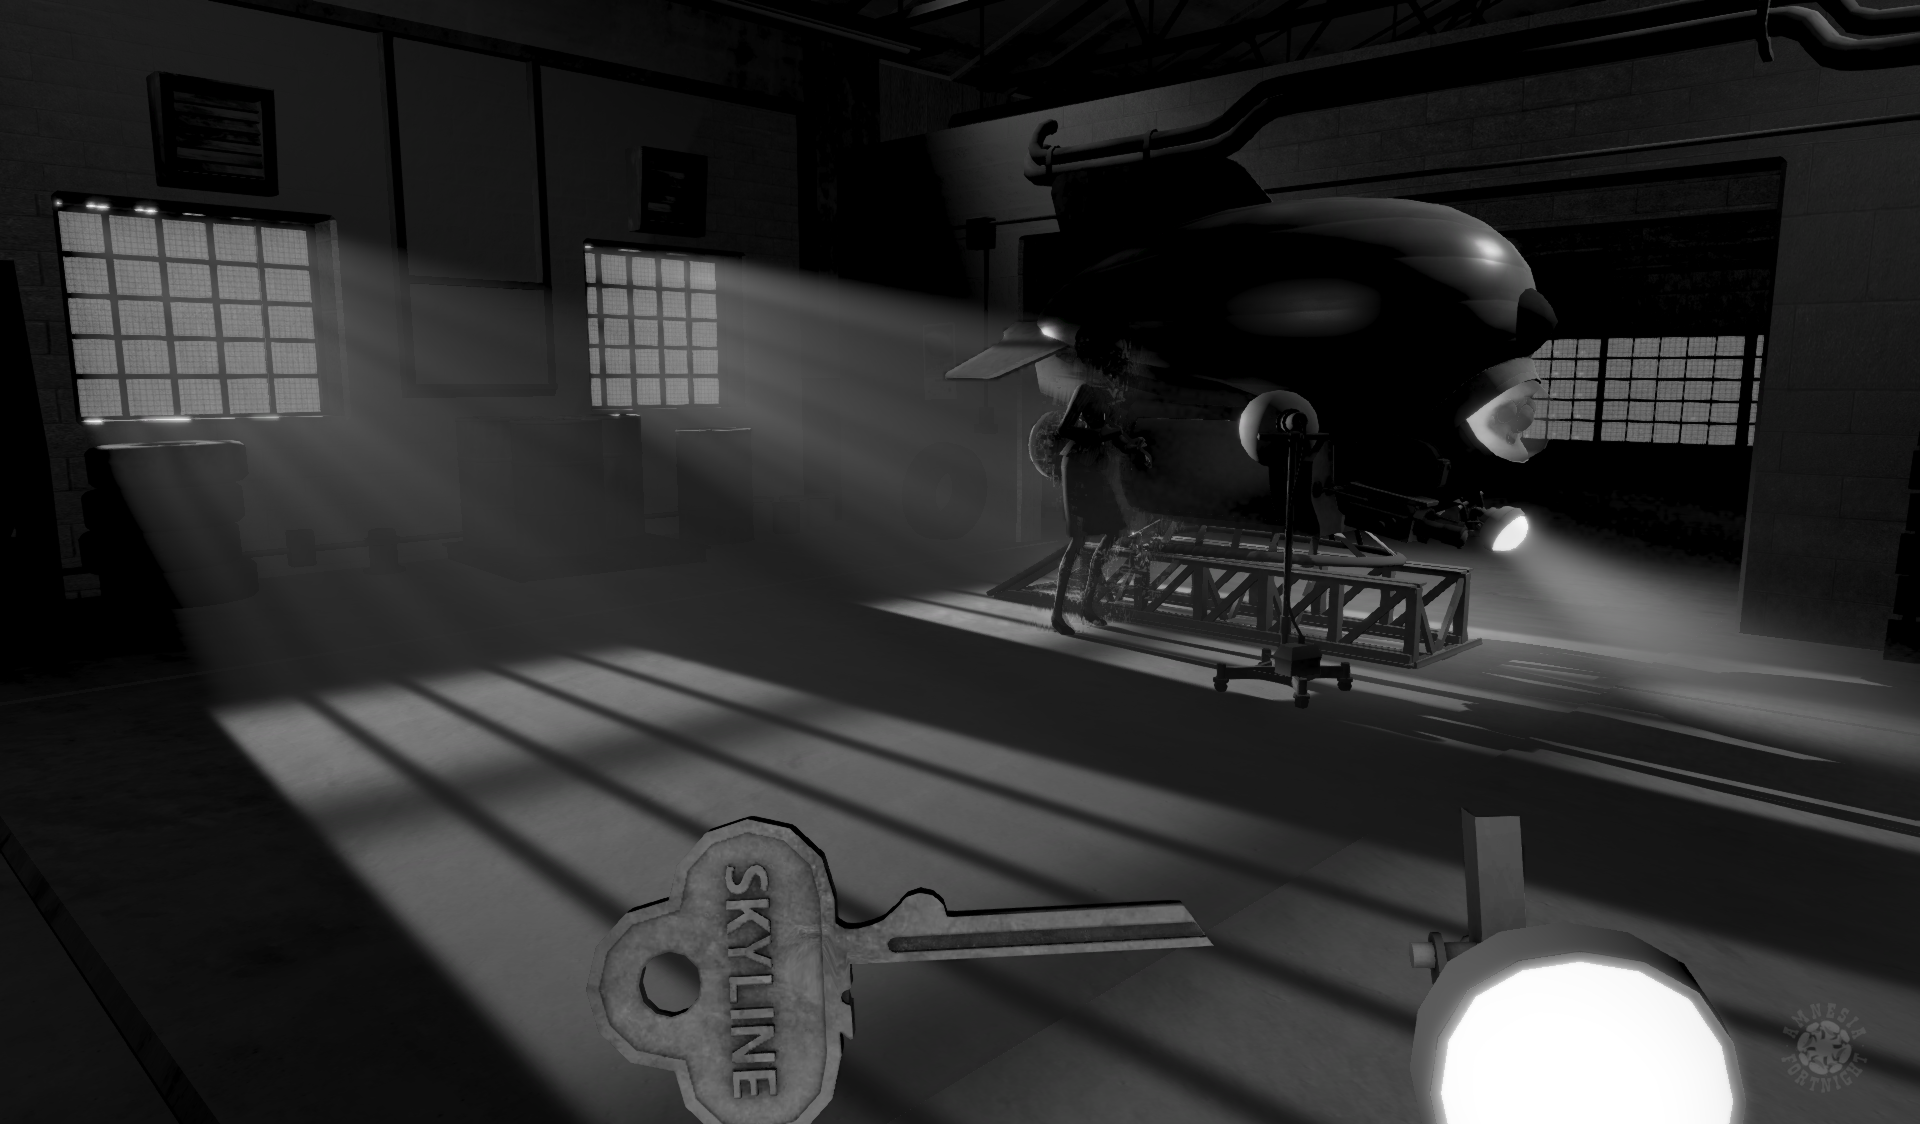
For ‘Mnemonic’ we decided to avoid 2D UI entirely. Fortunately the game doesn’t require menus and we only had to find a solution for the inventory. Items carried by the player are represented by real 3D models that are located on a ring around the camera. This way the inventory items are rendered as part of the regular scene and show up at the correct location in VR. This approach works very well and I would like to explore it further in a future project.

3D inventory in Mnemonic

3D inventory in Mnemonic

Post effects and other screen-space problems

Image post-processing of the rendered scene is a pretty standard (and useful) technique in games these days. Typical post effects include color correction, edge darkening (aka vignetting), anti-aliasing, blooming or depth-of-field blurring. These operations are usually applied in screen-space which makes them problematic for the same reason that 2D UI doesn’t work well in VR.

Unless the operations are spatially independent (e.g. color correction) it is important to take the interpupillary distance into account when rendering the effect. In ‘Mnemonic’ we offset the texture coordinates of extra textures used during the image post-processing step.

In the prototype the player is able to return to the ‘memory hub’ at any point by pressing a button and the transition is represented by an animated Rorschach image. By applying a horizontal offset to the Rorschach texture the effect essentially gets rendered at a virtual depth (much closer than infinity), which is important since the effect is faded in (and out) on top of the scene.

While this works alright in the prototype a better approach will be necessary for a full game. Drawing these kinds of effects in 3D space (just like the inventory) seems to be the only real solution for this problem. I’d love to experiment with camera-attached particles or similar techniques.

Of course there are effects that can’t be represented by 3D geometry (e.g. vignette) and more research will be necessary to figure out how to do implement them in VR.

Conclusion

I think the potential of VR to create an immersive experience for the player is very exciting, but creating an excellent VR experience isn’t trivial. In his talk at the Steam Dev Days Palmer Luckey (the CEO of Oculus) said that you really have to design a game with VR in mind and I very much agree with him. Adding VR support later on is very difficult and will require quite a few changes.

The games industry is only at the beginning of figuring out how to effectively use VR and I think next few years will be very interesting and exciting. I’m very grateful that I was able to experiment with VR during this year’s Amnesia Fortnight and I really hope that I can come back to it and work on a full game.

I’m very proud of what we achieved with ‘Mnemonic’ and I hope you will check out the prototype (especially if you own an Oculus Rift). You can still get access to all of the games on Humble Bundle.

Post scriptum

If you made it this far and you are still not tired of my ramblings, then you might also want to check out the excellent documentary about Amnesia Fortnight made by 2 Player Productions. You can find the entire playlist on YouTube.

I’m talking a bit about adding VR support to ‘Mnemonic’ in the episodes about day 9 (starting at 17:18) and 10 (starting at 37:44):

6.5 billion texels later…

Now that Broken Age Act 1 is done and available to the general public I started to do some post-launch stuff like catching up on sleep, meeting with friends and playing games I missed out on.

I also spend some time reflecting on the past 22 month of Broken Age development and I got to say it was an amazing journey for me! Working on a brand new and modern point-and-click adventure game with Tim is definitely a dream come true for me.

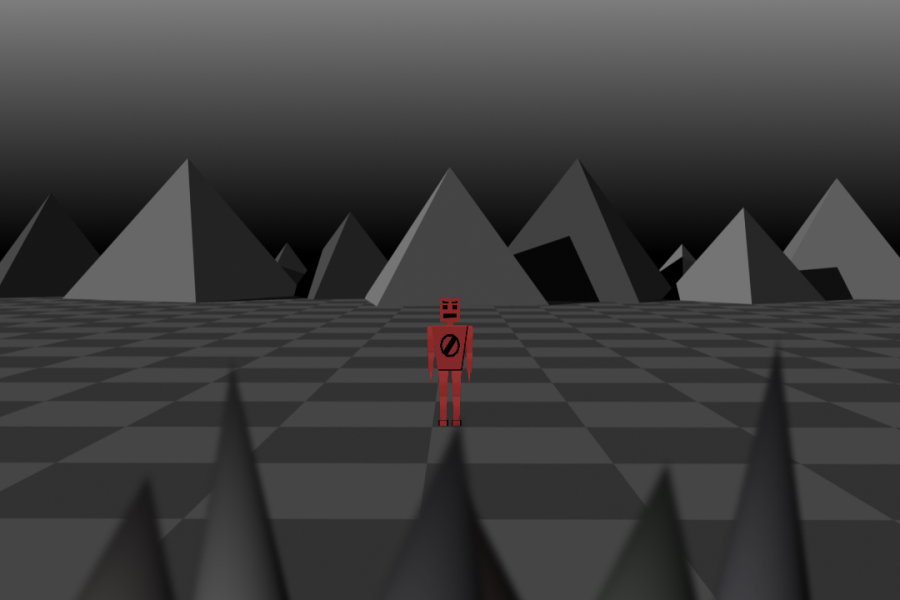
Since I was the first programmer on the project I wrote the first line of code for Broken Age, which is amazing and incredibly humbling. A few days after the official start of development Redbot was created and the game looked like this:

Redbot's Adventure

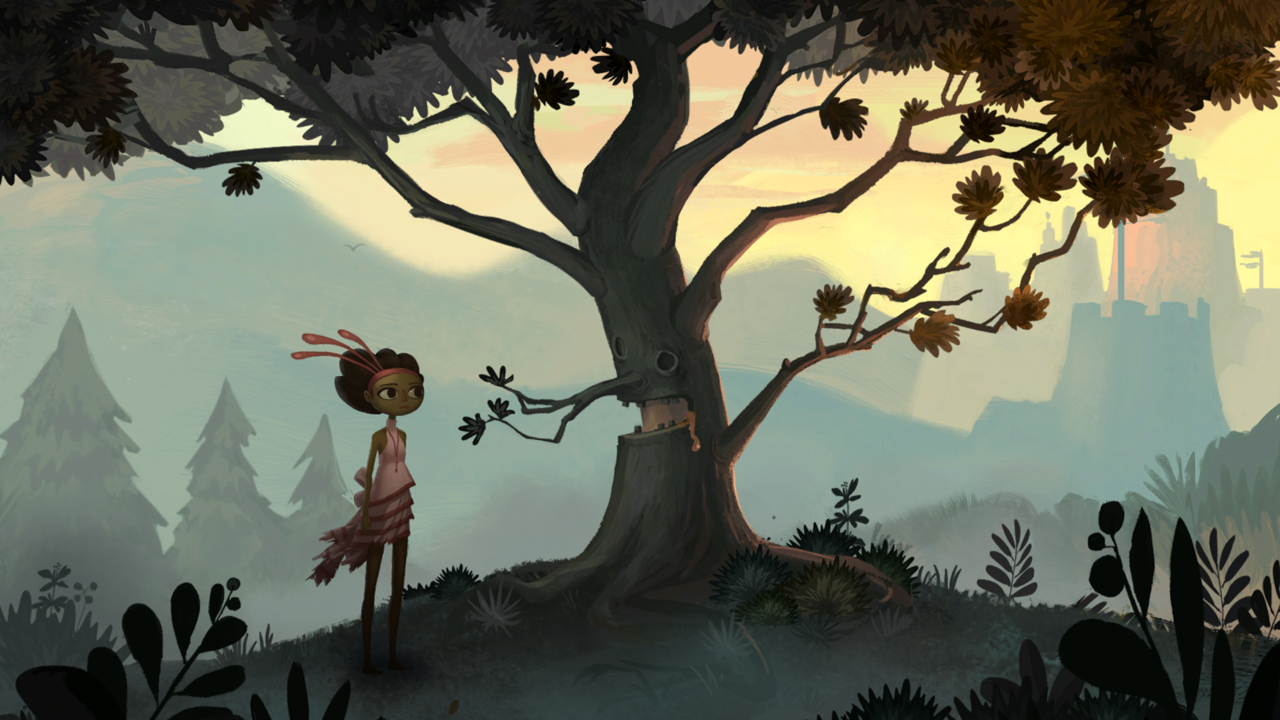
22 month and about 6.5 billion texels (texture pixels) later Broken Age has turned into this stunningly beautiful game:

Dialog Tree!

It is such an honor to be part of this amazing team and I’m very proud of how Broken Age has turned out… and it’s not even completely done yet. 🙂

I’ll end this post with a few words from Russell Watson: “It’s been a long road getting from there to here. It’s been a long time but my time is finally near.”

Dynamic 2D Character Lighting

It is certainly no secret that lighting can tremendously improve the visual quality of a game. In this blog post I’ll describe various techniques for dynamic 2D character lighting that are very easy to implement and don’t require any additional assets (e.g. normal maps). I have successfully used these techniques in various games like Monkey Island: Special Edition, Lucidity and most recently in Broken Age.

But why is character lighting important in 2D games? Very often artists will paint lighting (and shadowing) directly into the environment artwork, which is okay because the world is generally static. In fact it would be very difficult to compute the lighting for, let’s say, a background image in real-time, since no spatial information (e.g. z-depth, normal direction) is available. Characters on the other hand move through the world and will be visible in various locations with different lighting conditions, so it is generally not possible to paint the influence of light sources directly into the sprites (or textures). Therefore the only solution is to calculate the character lighting during run-time.

The video below demonstrates how Shay (who is one of the main characters in Broken Age) looks with and without lighting. I hope you’ll agree that lighting helps to integrate Shay into (the beautiful) world.

Ambient Lighting

The idea behind ambient lighting is to make a character look like they are part of the game world rather than floating on top of it. So if, for example, a player moves from a shadowed into a fully lit area the visual appearance of the character should change from dark to bright.

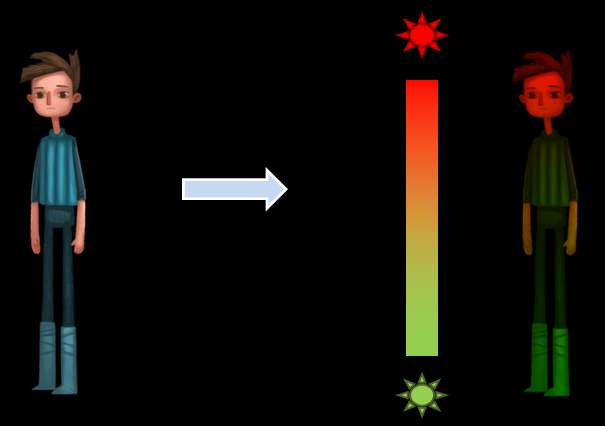
Thankfully this can be achieved very easily by tinting the sprite (or texture). Using a gradient tint allows independent control of the color of the lower and upper part of the body, which makes it possible to emulate ambient occlusion between the floor and the character.

B_D2DCL_Ambient_Gradient

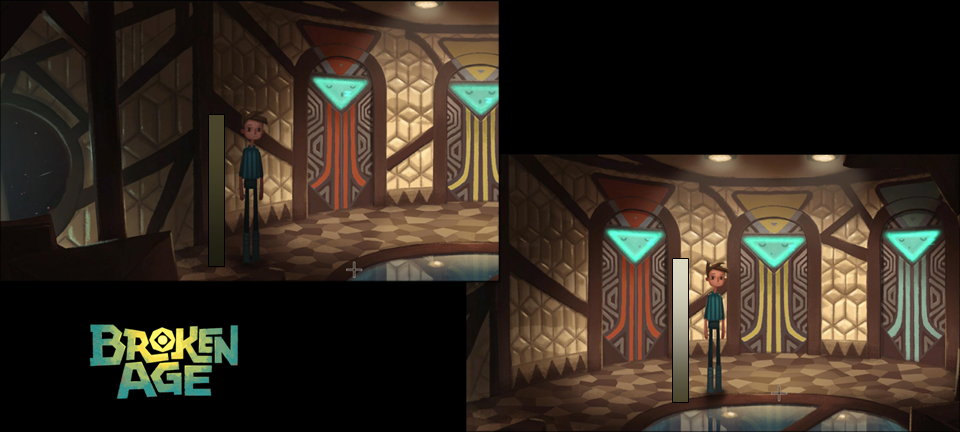
Ambient gradient tinting is the backbone of Broken Age’s lighting system and is used in every scene for every character. The following picture demonstrates how the ambient gradient changes based on the location of Shay.

B_D2DCL_Ambient_Gradient_Sampling

There are different ways to interpolate the gradient color across the body of a character. The simplest approach is to use the bounding box in which case vertices on the head sample from top of the gradient whereas the feet use the bottom of the gradient. This approach works great for sprite-based characters, but doesn’t offer much control over the shape of the gradient.

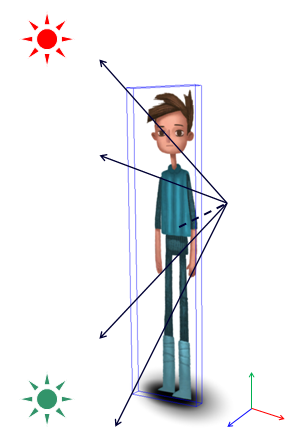
Broken Age applies a different strategy by computing normals as the vectors from the translated center of the bounding box to each vertex. The ambient gradient is then sampled based on the y-coordinate of the resulting normal. Not only does this technique work great with skinned geometry it also makes it possible to define how quickly the gradient interpolates across the body by changing the offset of the center. My GDC Europe talk ‘Broken Age’s Approach to Scalability’ contains more information about this approach, so please feel free to check it out if you want to know more about it.

B_D2DCL_Normals

Local Lighting

The goal of local lighting is to show the influence of nearby light sources. In other words it answers the questions where the characters are in relation to lights. The video of Monkey Island: Special Edition (MISE) below shows how the local lighting of the campfire illuminates the two characters. Please make sure to watch it fullscreen and in high definition.

If you look closely you’ll notice that the campfire only illuminates the parts of the characters that are facing towards it. There are different ways to achieve this look. The characters in Broken Age have hand authored normal maps that are then used to compute the reflected light. While painted normals offer a lot of artistic freedom they obviously require a lot of time to create.

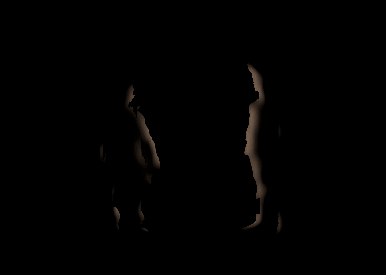
In MISE we weren’t able to go down this route due to time constraints of the development schedule, so we needed a technique that required no extra assets and only a minimal amount of tweaking. Our solution utilizes a screen-space light map that contains the illumination of nearby light sources. The following image shows the light map for the lookout scene.

B_D2DCL_Lookout_Lightmap

In order to calculate the light map we first render the alpha mask of the characters into an offscreen render-target (see image A below) before downsampling and blurring it using a Gaussian kernel (image B). The resulting image can be interpreted as a soft height field containing a blobby approximation of the characters. With this in place we can now compute the normals of the blob approximation as the gradient of the height field (see image C). Now that normal information is available we can finally calculate the light map by accumulating the reflected illumination from all nearby light sources (image D). In MISE we used a very simple Labertian lighting model (aka ‘n dot l’), but more a sophisticated formula can easily be used instead.

B_D2DCL_Lightmap_Calculation

The resulting lighting data can be combined with the scene in different ways. The easiest solution is to blit the light map on top of the framebuffer using additive blending. We used this approach in MISE and it worked great, but has the disadvantage that reflected light is barely visible on bright pixels (e.g. Guybrush’s shirt).

Another compositing strategy would be to sample the illumination from the light map in the character shader. This way the light can be integrated in different ways with the texels of the sprite (or texture), so characters could effectively have varying reflectivity. In this case the light map essentially represents the results of a light pre-pass.

Light Sources

One thing I haven’t talked about up until now is how light sources are authored. It should be easy to associate different parts of the world with specific parameters in order to be able to match the character lighting with the illumination painted into the environment.

Representing light sources as radial basis functions works great for ambient as well as local lighting. The gradient tint for each character can easily be computed as the weighted average based on the distance from the light sources. In my experience it is also a good idea to expose some kind of global light, which is sampled if there are no light sources nearby. The following image illustrates the radial basis function blending for ambient gradient tints.

B_D2DCL_RBF_Blending

The light map can be calculated by drawing the light sources as approximated shapes (e.g. quad or circle) into the render-target. The color and intensity of each output fragment is computed by evaluating the lighting model of your choice. In MISE we calculated the reflected light basically like this:

vec l = light_pos - fragment_world_pos
vec n = tex2D(normal_map, fragment_screen_pos)
scalar nDotL = saturate(dot(normalize(l), n))
scalar dist = length(l)
vec result = light_color * nDotL / (dist * dist)

Using radial basis functions has the additional benefit that it’s very easy to animate a light source both by changing its transformation (e.g. position, scale) as well as parameters (e.g. color, intensity). A flickering campfire can easily be achieved by interpolating between two states using a (nice) noise function. Attaching this light source to the hand of a character effectively makes it a cool looking torch.

Conclusion

Dynamic character lighting helps to make a game world and its inhabitants look more believable and interesting. Thankfully it’s relatively easy to implement a lighting system that produces nice results and I hope that my blog posts could provide you with some inspiration as well as practical advice. Please feel free to post questions as comments below.

That’s it for today. The last one to leave turn off the (dynamic) lights! 🙂

PS.: I talked about this topic at Unknown Worlds’ postmortem event and you can watch the recording here: http://www.twitch.tv/naturalselection2/c/3341463

What I expect from a Graphics Programmer candidate

This is a crosspost from #AltDevBlog: http://www.altdevblogaday.com/2013/11/08/how-to-become-a-graphics-programmer-in-the-games-industry/

As we were recently hiring a new Graphics Programmer at Double Fine I had to identify what kind of technical knowledge and skills we would expect from a potential candidate. Although this definition will be somewhat specific to what we look for in a candidate, it might still be of interest to other coders trying to score a job in the industry as a Rendering Engineer.

This post might help you to identify areas to learn about in order to get you closer to your goal of becoming a Graphics Engineer, whether you just finished your degree or perhaps have been working in the games industry in a different role. Alternately, if you are a seasoned Rendering Programmer, then you know all of this stuff and I would love to hear your comments on the topic.

Know the Hardware

Learning about the strengths and weaknesses of the hardware that will execute your code should be important for any programmer, but it’s an essential skill for a Graphics Engineer. Making your game look beautiful is important; getting all of the fancy effects to run at target frame rate is often the trickier part.

Of course, it would be unrealistic to expect you to know every little detail about the underlying hardware (especially if you are just starting out) but having a good high-level understanding of what is involved to make a 3D model appear on screen is a mandatory skill, in my opinion. A candidate should definitely know about the common GPU pipeline stages (e.g. vertex- and pixel-shader, rasterizer, etc.), what their functionality is and whether or not they are programmable, configurable or fixed.

Very often, there are many ways to implement a rendering effect, so it’s important to know which solution will work best on a given target device. Nothing is worse than having to tell the artists that they will have to modify all of the existing assets, because the GPU doesn’t support a necessary feature very well.

For example, the game that I am currently working on is targeting desktop computers as well as mobile devices, which is important because mobile GPUs have very different performance characteristics compared to their desktop counterparts (if you are interested you can find my micro talk on this topic below). Our team took this difference into account when making decisions about the scene complexity and what kind of effects we would be able to draw.

A great way to learn more about GPUs is to read chapter 18 of Real-Time Rendering (Third Edition), because it contains an excellent overview of the Xbox 360, Playstation 3 and Mali (mobile) rendering architectures.

Good Math Skills

Extensive knowledge of trigonometry, linear algebra and even calculus is very important for a Graphics Programmer, since a lot of the day to day work involves dealing with math problems of varying complexities.

I certainly expect a candidate to know about the dot and cross products and why they are very useful in computer graphics. In addition to that, it is essential to have an intuitive understanding for the contents of a matrix, because debugging a rendering problem can make it necessary to manually ‘decompose’ a matrix in order to identify incorrect values. For example, not that long ago I had to fix a problem in our animation system and was able to identify the source of the problem purely by looking at the joint matrices.

In my opinion, a candidate should be able to analytically calculate the intersection between a ray and a plane. Also, given an incident vector and a normal, I would expect every Rendering Engineer to be able to easily derive the reflected vector.

There are plenty of resources available on the web. You can find some good resources in the links section. I would also strongly recommend attempting to solve some of these problems on a piece of paper instead of looking at a preexisting solution. It’s actually kind of fun, so you should definitely give it a try.

Passion for Computer Graphics

An ideal candidate will keep up to date with the latest developments in computer graphics especially since the field is constantly and rapidly advancing (just compare the visual fidelity of games made 10 years ago with what is possible today).

There are plenty of fascinating research papers (e.g. current SIGGRAPH publications), developer talks (e.g. GDC presentations) and technical blogs available on the internet, so it should be pretty easy to find something that interests you. You can find quite a few blogs of fellow Rendering Engineers in the links section.

Of course implementing an algorithm is the best way to learn about it, plus it gives you something to talk about in an interview. Writing a cool graphics demo also helps you to practice your skills and most of all it is a lot of fun.

Performance Analysis and Optimization

One of the responsibilities of a Graphics Programmer is to profile the game in order to identify and remove rendering related bottlenecks. If you are just starting out I wouldn’t necessarily expect you to have a lot of practical experience in this area, but you should definitely know the difference between being CPU and GPU bound.

An ideal candidate will have used at least one graphics analysis tool like PIX (part of the DirectX SDK), gDEBugger or Intel’s GPA. These applications are available for free allowing you to take a closer look at what’s going on inside of a GPU, isolate bugs (e.g. incorrect render-state when drawing geometry) and identify performance problems (e.g. texture stalls, slow shaders, etc.)

Conclusion

The job of a Graphics Programmer is pretty awesome since you’ll be directly involved with the visual appearance of a product. The look of a game is very often the first thing a player will know about it (e.g. trailers, screenshots) which has been very gratifying for me personally.

Truth be told, you won’t be able to write fancy shaders every day. You should be prepared to work on other tasks such as: data compression (e.g. textures, meshes, animations), mathematical and geometry problems (e.g. culling, intersection computations) as well as plenty of profiling and optimizations. Especially, the latter task can be very challenging since the GPU and the associated driver cannot be modified.

To sum up, becoming Rendering Engineer requires a lot of expert knowledge, and it is certainly not the easiest way to get a foot in the proverbial games industry door, but if you are passionate about computer graphics it might be the right place for you!

Post Scriptum

Please make sure to also check out the excellent #AltDevBlog article “So you want to be a Graphics Programmer” by Keith Judge.

As mentioned above I recently gave a micro talk about some of the fundamental differences between desktop and mobile GPUs at the PostMortem event hosted by Unknown Worlds.

Resonance

I agree with my colleague David Gardner that adventure games aren’t dead. They just seemed to be standing still though. It is true that there were many excellent adventure games (with a large production value) in the last couple of years, but few tried to move the genre forward.

And then there was Resonance! It’s very traditional and really progressive at the same time. So if you enjoy the ‘old school’ adventure look, an excellent near-future Sci-Fi story or if you simply would like to experience the next evolutionary step in the adventure genre then you shouldn’t hesitate and get a copy of the game.

What impressed me most about Resonance is that developer xiigames succeeded to add something new and exciting to the proven adventure game formula. One of my favorite new features is the ‘short term memory’ which allows you to drag objects or characters into it, so that they can then be used as topics in conversations with other characters. It makes so much sense and feels very natural. In fact while playing the game I was wondering how I played other adventures without this feature.

In addition to moving the genre forward Resonance also has a fantastic story with multiple story twists. There are few games that surprise me in terms of plot development, but Resonance certainly managed to do just that.

I really have nothing bad to say about the game and I’m not alone. Rock Paper Shotgun, Kotaku and many other high profile game review sites praise the game.

Stating the obvious: The adventure of programming

It just occurred to me the other day (and I’m not sure why it took me so long to make that connection) that enjoy programming and adventure games because of similar reasons.

Adventure games are all about puzzles and the joy of solving them. Well so is programming. You are constantly confronted with questions like ‘Why does the system behave like that?’, ‘How can we get around these limitations and make feature X work?’

The other day I was trying to track down a weird issue were the parts of the screen would sometimes get corrupted. Initially I thought it had to do with how I was managing graphics memory, so I was poking around in that code but couldn’t find the problem. The issue turned out to be in a completely different system and I (eventually) identified the source by observation of the behavior of the affected code. I approached the problem just like a puzzle in an adventure game (I even tried to look up the solution on the internet) and felt quite good after I finally solved the problem.

But there are more similarities than solving puzzles. The taxonomy of adventures in my simple world view is defined by whether the puzzles follow designer logic or observational logic. For the former category you basically have to figure out what the designer was thinking when he was creating the puzzle. Very often there is only one solution and it might not be the most obvious/logical one (usually the solution is very creative and funny though). The latter category describes games were the puzzles can be solved by observing the environment and making logical conclusions. I’m not going to name examples here, but I’m sure you know what I’m talking about.

The same taxonomy can be applied to programming too! For example if you have to work with a closed-source API you’ll have to start thinking like the architect of the system in order to be able to use it properly. Very often there is only one right way of interfacing with the API and other approaches will introduce obvious (and worse than that non obvious) bugs. Unfortunately there barely is a funny pay-off though. Observational logic is also important, because debugging pretty much relies on reasoning based on the changing state of systems.

Not only that but sometimes you even have to do pixel hunting when trying to find and fix syntax problems. Also did you ever notice that branching is very similar to dialog trees… 😀

Maybe it’s far fetched, but it would explain why I like adventure games and coding a lot. 🙂

realMyst

I find myself playing a lot of ‘old-school’ adventure games recently mostly because working on the Double Fine Adventure project has re-sparked my interest in the genre.

Recently I got realMyst for my iPad which is the real-time rendered version of the classic adventure game Myst. I contrast to the LucasArts adventures the game emphasis is on logical puzzles. Back in the day I didn’t like Myst at all. The puzzles all seemed artificial to me and I could never figure out what I am actually supposed to do.

The latter problem is still an issue, because you find yourself on the island without any clear goals. It’s up to the player to find out what to do. I generally like exploration as a game mechanic, but Myst is going a bit too far in my opinion.

Apart from that I really enjoyed playing the game though. Most of the puzzles are solvable with a bit of thinking and the progress is timed quite well. Whenever I felt like giving up a realization somehow appeared and I could progress.

My only complaint is the forced repetition in order to get both the blue and the red page from each ‘age’. I mean I can understand that I wouldn’t be able to carry a unrealistic amount of items, but why would I not be able to carry to book pages at the same time?

The iPad controls could use a bit tuning too, but apart from that a solid (logic) adventure game. I guess there is a reason why the Myst series is so successful… 🙂